sea salted caramels

A few weeks back some friends and I made this sweet and salty caramel video, inspired by David Lebowitz’ recipe…because, who doesn’t love a good salty caramel? They are the best. And once you get over the initial fear of making them, they are relatively easy to whip up, while still looking super impressive to anyone you gift them to. Just make sure to refrain from licking the spoon covered in hot caramel. It hurts. I learned this the hard way.

Thank you Tara Donne, Arion Doerr, and Kira Corbin for all your hard work putting this together. And for making it so fun! Cheers.

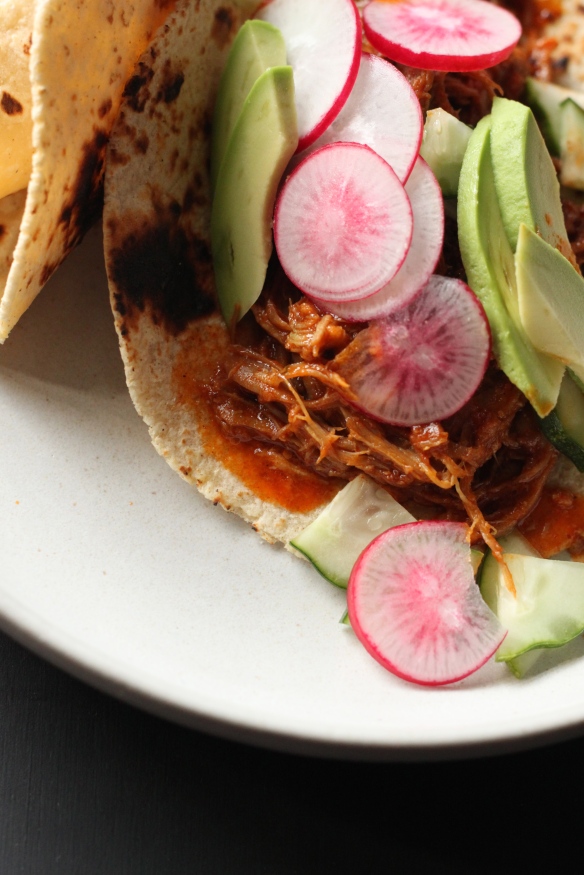
pork tacos

I love it when you make a big pot of something, end up with ample leftovers, and can turn it into something else. That big batch of pulled pork that I had sitting in my fridge last week turned into this week’s pulled pork tacos.

IMG_3810

The key to a good taco is a good corn tortilla. Homemade is best, but the next best thing is Tortilla Factory brand tortillas. And don’t forget to char your tortillas. It works best over a gas stove. Set your tortillas over a low flame and let them get slightly charry on both sides. Top 2 tortillas with reheated pulled pork and whatever fresh crunchy things you have on hand. I like radish, cucumber, and avocado. Bonkers good.

IMG_3807

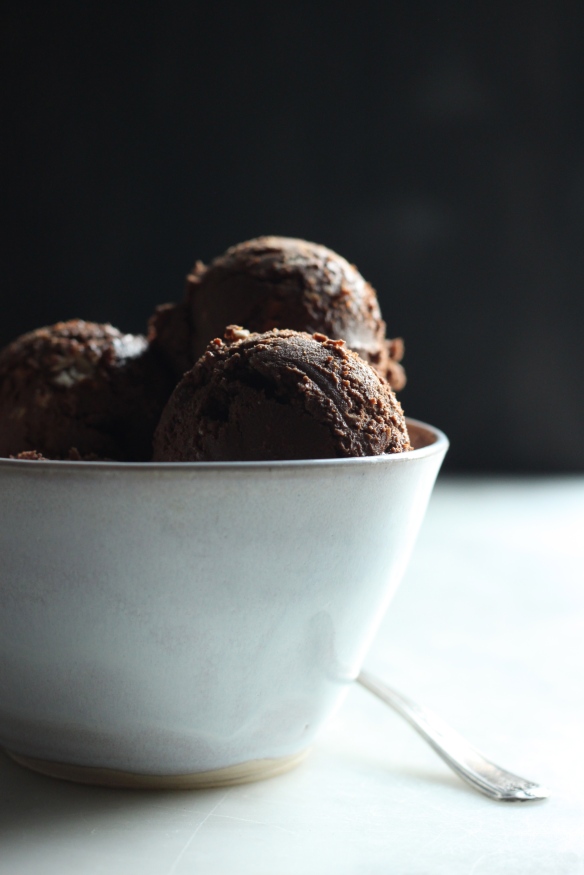
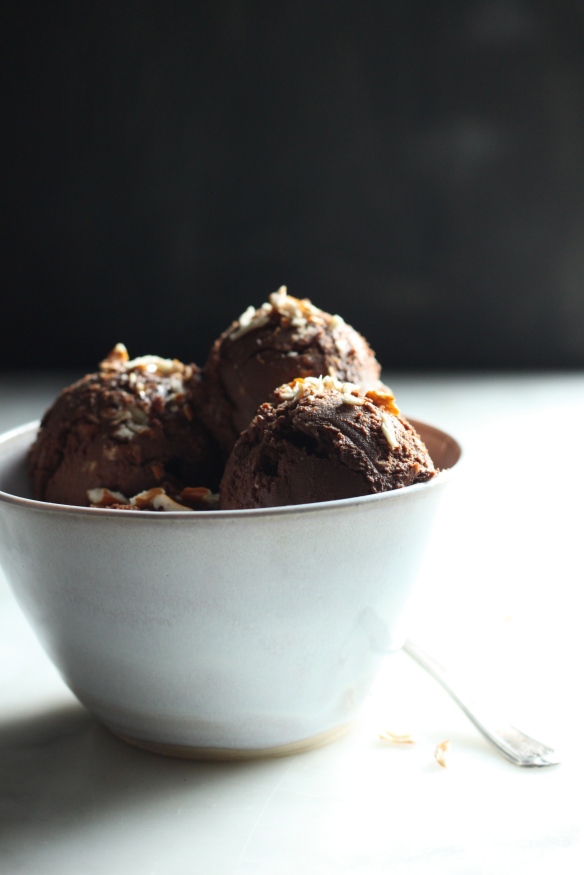
chocolate olive oil ice cream with salty pretzels

IMG_3648

Lately I’ve been dreaming about opening an ice cream shop. In a small town. Somewhere beautiful. A simple place, warm and inviting, where you’d want to stay a while. And eat ice cream out of handmade bowls. It makes me smile just thinking about it.

So while I’m freezing my buns off in NYC, what better way to dream than think up ice cream flavors. This one’s a doozy.

IMG_3664
Chocolate Olive Oil Ice Cream with Salted Pretzels

6 oz. nice semi-sweet chocolate, chopped
1 1/2 cups heavy cream
1 1/2 cup milk
3/4 cup sugar
6 egg yolks
1/4 cup olive oil
pinch of flaky salt
salted pretzels, coarsely chopped 

Fill a large bowl with ice water. Place your chopped chocolate in a slightly smaller bowl and set aside. In a saucepan heat the cream, milk, and 1/2 cup sugar until just simmering. In a small bowl, whisk the egg yolks and remaining 1/4 cups sugar until light in color, a few minutes. Slowly whisk in about 1/2 cup of the hot cream mixture into the yolks to temper them. Then add the yolks to the pot and stir constantly on medium-low heat for 5-8 minutes until thickened. Strain this mixture into your chocolate bowl and let sit for 5 minutes, then stir to combine and melt the chocolate. In a steady stream, whisk in your olive oil and add your salt. Set your bowl carefully over the ice bath, stirring occasionally to cool it down. Once cooled, churn through your ice cream maker and freeze in a glass container. Serve with crushed pretzels, a drizzle of olive oil, and a pinch of salt.
IMG_3663

the fiber loaf

This loaf is not for the faint of heart. It’s seedy. It’s dense. It’s flourless and yeastless. It’s not your typical bread. My friend aptly calls it The Fiber Bomb.

If you’re into that sort of thing, it’s super easy to make, tastes delicious toasted with butter, and it’s packed with nutritious things. Perhaps that’s why Sarah Britton calls it the Life Changing Loaf.

IMG_3520 copy

Fiber Loaf (adapted every so slightly from My New Roots)

1 ½ cups rolled oats
1 cup roasted salted sunflower seeds
1/2 cup nuts, roughly chopped (hazelnuts, pecans, almonds, walnuts, whatever)
½ cup ground flax
2 Tbsp. chia seeds
1/4 cup psyllium seed husks
1 tsp. fine grain sea salt
1 Tbsp. maple syrup
3 Tbsp. melted coconut oil
1 ½ cups water

In a large bowl combine all dry ingredients. Stir in the maple syrup, coconut oil, and water. Transfer to a loaf pan and smooth out the top of the dough. Let this sit for a few hours or overnight. Preheat oven to 350°F.

IMG_3512 copy

Bake the loaf for 25 minutes. Remove from the oven and loosen the edges using a butter knife. Place a baking sheet upsidedown over the top of the loaf pan, and carefully flip it so that the bread falls onto the baking sheet…bang it a few times to coax it out. Place the baking sheet in the oven and bake the bread for another 40-45 minutes. Place the loaf pan on a cooling rack and let cool completely before slicing. I recommend slicing the whole loaf and storing your slices in the freezer. Toast a few each morning and drown in butter and salt.

IMG_3515 copy

vanilla lavender canelés

OPENER

Photo by Linda Pugliese. Published in Sweet Paul Magazine Winter 2013.

A few months back I shot a story with photographer Linda Pugliese for Sweet Paul Magazine about the Provencal tradition of serving 13 desserts on Christmas day. It’s a big undertaking for sure, but thankfully some of the desserts are incredibly simple to make, like dates stuffed with almond paste. Needless to say, we had our fair share of sugar that day. As I rolled myself into bed that night, there was one dessert that haunted me. Vanilla Lavender Canelés. Burnt caramely shells, custardy innards, an intoxicating fragrance…they are just perfect. And easier than you might think to make.

CANELES

Photo by Linda Pugliese. Published in Sweet Paul Magazine Winter 2013.

First things first, buy the molds. Linda lent me her silicone molds and they worked beautifully.

Vanilla Lavender Canelés
Makes 30

2 cups milk
4 tablespoons unsalted butter, plus more for the molds
1 vanilla bean, scraped
1 tablespoon dried lavender
½ cup+1 tablespoon flour
2 cups sugar
¼ teaspoon salt
2 eggs
2 egg yolks
1 tablespoon whiskey
2 canelé molds

In a medium pot, bring milk, butter, vanilla bean, and lavender to boil. Remove from the heat and let steep for 10 minutes. Meanwhile, in a large bowl whisk the flour, sugar, salt, and eggs. Strain the warm milk mixture, slowly whisking it into the flour mixture. Stir in the whiskey. Let this cool in the fridge until chilled, about an hour. If you want to speed up the chilling process, set your bowl over an ice bath and stir occasionally for 20 minutes. Preheat the oven to 500°F. Place 2 canelé molds on a large baking sheet and lightly brush them with melted butter. Pour the batter ²⁄3 of the way up each mold. Bake for 5 minutes. Lower the oven to 375°F and continue baking for 1 hour until your canelés are golden brown. Turn out onto wire racks while hot and cool to room temp.

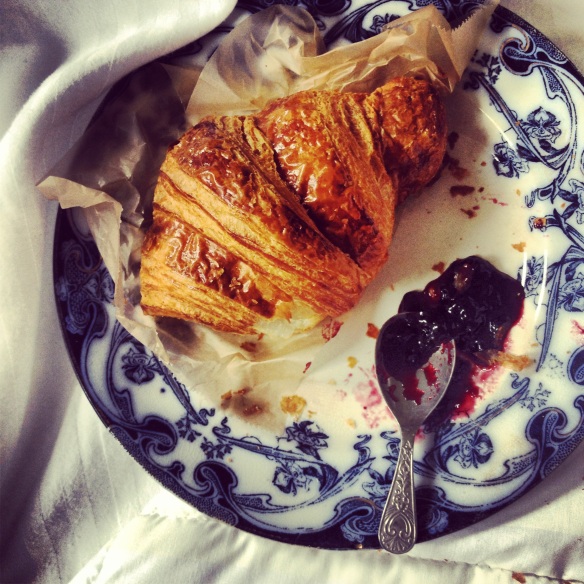
breakfast in bed

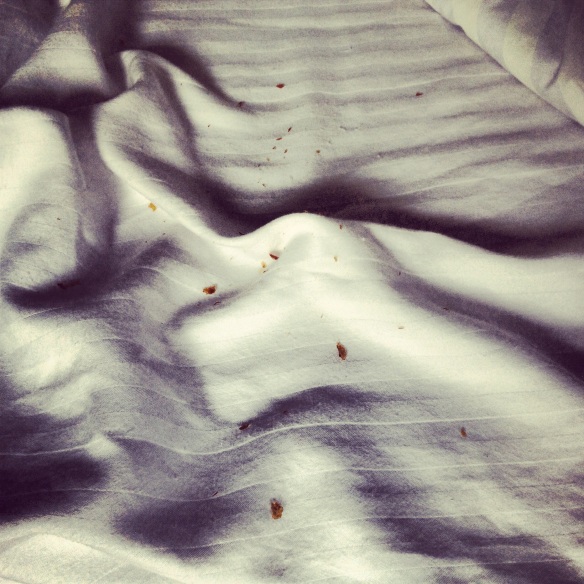
It’s become a bit of a guilty pleasure. Waking up on a saturday just early enough to get a fresh croissant, make a cup of coffee, climb back into bed, and make a total mess. The better the croissant, the bigger the mess.

IMG_6671There’s something about crawling under the cover of cool sheets, indulging in something buttery crumbly and sweet, with nowhere to go and nowhere to be, that’s just perfect.

IMG_6698To all those who think crumbs in bed are a faux pas, loosen up. You’re missing out.

dandelion wine

I recently came across a gorgeous book called Cooking with Flowers and it inspired me to get creative with things I hadn’t thought about before. For instance, the dandelion.

IMG_6429

Those sad little buds that get picked and tossed to the curb every spring. So before the parks department and all the hip little Brooklyn children had a chance to viciously pluck them all from Prospect Park I decided to go picking and put them to good use making dandelion wine. A flower that once seemed so meaningless suddenly looked beautiful to me.

The recipe is quite simple. Not so sure it’s fair to call this wine, it’s more like a sweet sun tea. And it’s very sweet, so I would recommend using this as a cocktail mixer rather than drinking a glass.

IMG_6443

Dandelion Wine

4 cups dandelion flowers
6 cups boiling water
2 cups sugar
1 meyer lemon, sliced
1 orange, sliced

Place dandelions in a large heatproof bowl or pot and add the boiling water. Let steep for 4 hours covered. Strain this mixture, pressing the flowers to extract all the flavor. Discard the flowers. Bring the strained liquid back to a boil. Add the sugar and citrus to a large gallon jar. Pour the hot tea into the jar and stir to dissolve. Cover the jar and let stand for 2 weeks on the counter, shaking the jar once a day. Strain through a fine mesh strainer lined with cheesecloth and refrigerate until chilled. I’m thinking this over a few cold cubes and a couple shots of gin will be the perfect Memorial Day Weekend cocktail.

IMG_7081

sassafras! and other wild edibles

This is going to sound terribly Brooklyn…I went on a foraging excursion through Prospect Park the other day. I don’t care. It was awesome. Did you know you can eat dandelion buds and violets and all kinds of pine? And that Japanese knotweed is a terribly invasive yet totally delicious stalk that grows everywhere and tastes like green apple dipped in celery and sprinkled with lemongrass? And that if you put mugwort in your pillow at night you will have crazy dreams? And that there are sassafras trees all over Prospect Park whose leaves and roots taste like root beer!? Awesome, I tell you.

IMG_6574

Jen gnawing on some J knotweed

IMG_6774
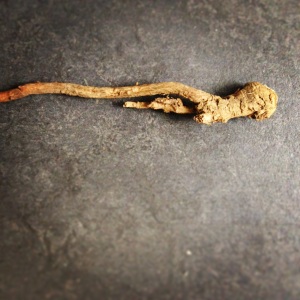
Here’s a simple recipe for sassafras tea. It’s a blood purifier so it flushes toxins out of the body. And it’s delicious. Uproot a small sassafras plant…it will take some elbow grease. Scratch away the brown bark to reveal the lighter interior. Score the flesh all over. Boil water and steep for at least 2 hours covered. Reheat and drink hot. My next project will be root beer.

IMG_6743

The great people at Loomstate organized this free event and they plan on hosting more. Check out Loomstate’s Facebook Page to keep tabs on when the next excursion will be.

highlights from Santa Barbara + Bozeman

IMG_5911

First morning in Santa Barbara. Coffee. Bike ride. This.

IMG_6037

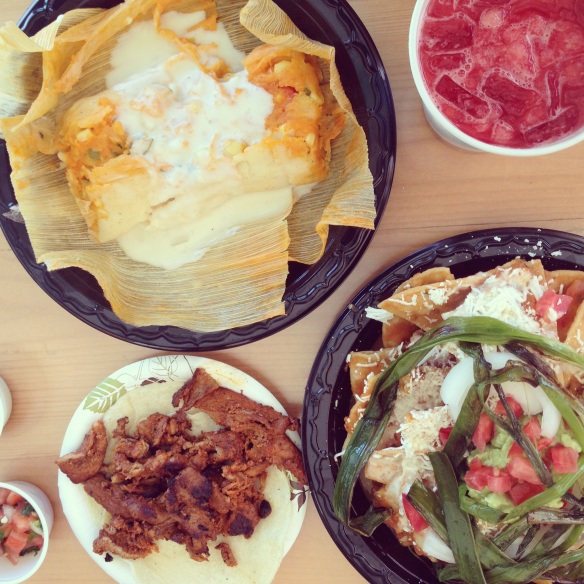
Chilequiles, tamale, pork taco, and fresh watermelon agua fresca at Super Rica, one of Julia Child’s favorites.

IMG_5989

Cold Springs Tavern on a Sunday afternoon.

IMG_5990

BBQ on the hillside at 11:30am.

IMG_5988

A Sunday tradition in these parts.

IMG_5981

Tri-tip sandwiches smothered in bbq and horseradish sauce.

IMG_5987

Almond cream pastry from Solvang Bakery.

IMG_5852

Satsuma. The best.

IMG_5876

Road trip to wine country in a white Mustang Convertible.

IMG_5890

Strolling the grounds at Bridlewood Vineyards

IMG_5910

Marshmallow oreo tower, because we forgot to buy Aliza a proper birthday cake.

IMG_6066

Municipal Winemakers.

IMG_6077

My favorite place to be at 5 o’clock.

IMG_5763

Montana with the girls. Wide open spaces.

IMG_5734

Cannelles right out of the oven at Le Chatelaine Chocolate, Bozeman.

IMG_5801

Road trip to Norris Hot Springs with Riley and some gas stations snacks. Mexican party mix and twizzlers.

IMG_5798

Hot springs in the middle of the freezing cold mountains. Snack bar included.

IMG_5722

And my favorite, breakfast with Zana.

conchord resurrected

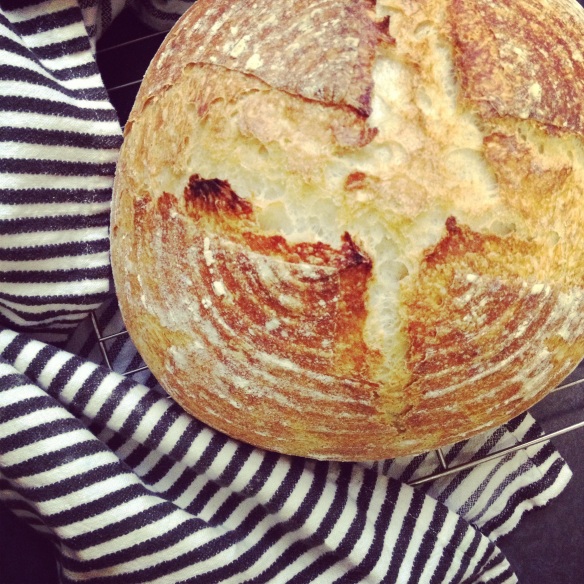
IMG_5672urlGood news. My sourdough skills are back. And it’s all thanks to this guy, Nathan Leamy, my sourdough guru who was kind enough to swing by my house on his bike in the freezing cold to deliver me a fresh batch of his Conchord starter. Because, that’s what good teachers do.

I’ve determined that a couple of things were at play causing my sourdough not to work properly. One, I wasn’t feeding the starter enough. If left out on the counter, it should be fed once every few days. If stored in the fridge, you don’t have to feed it as often. Once a week is fine. My starter didn’t die, but it certainly wasn’t as lively as I wanted it to be. You want your starter to be fragrant and bubbly on the surface.

IMG_5650Two, I was feeding it equal volumes flour and water, when it should be equal weights. This made my starter a little too thin. You want it to be the consistency of thick pancake batter. And three, my apartment is freezing. When the dough is proofing, you want it to be in a warm place. I have had luck heating my oven to 200 degrees, turning it off, and then setting the dough in the slightly warmed oven with the door open. Over time it tends to get too cold again, so just repeat that quick heating process as necessary.

And four, my sourdough recipe called for a “splash of olive oil”. The way it’s written led me to believe the oil went into the dough, when really this splash is meant to grease the bowl that the dough sits in. Huge goof.

Here’s the thing, it was beginner’s luck, that first perfect loaf. My starter was fresh and active. It was warm in my kitchen that day. I ignored the olive oil step. But you know what, after many failed attempts, my last loaf was even better than the first, because now I understand the underlying principles, the chemistry, and the method behind bread baking. Lesson learned, you never truly understand a recipe until you f*%# it up completely and have to retrace your steps to figure out where you went wrong. And once you get it, the success tastes even better.